Pattern Exploration: SPATS!
I've always been fascinated by the concept of spats. I've not really worn them before except for musical productions when I was in college.
However, with my new styling of vintage elements and a capsule wardrobe, I have been tucking my trousers into my socks and it looks bit too sloppy for my taste. It definitely gives an edgy feeling to what I wear, but I want a cleaner line. So I looked up spats and gaiters.
Here is what I was wearing when I came into work today:
This outfit consists of Doublet (cream wool), sleeveless blazer (brown/orange/blue plaid), Brown topcoat (brown/gray diamond twill with snazzy lining printed with Monet's Waterlilies). You can see the lapels of all three layers as well as my mask right under my chin. Now, I'm still learning to style myself with these particular pieces of my capsule wardrobe but lemme tell you, I felt ten feet tall today, wearing this look. The sensation of the doublet and the sleeveless blazer were just like wearing a doublet and jerkin and it felt perfect. The knee-length top coat is a new layering piece for me and I just love it.
I found a spats pattern in one of my tailoring books, The Cutter's Practical Guide ca. 1900-1907 by D. W. Vincent.
With the original measures, the spats ended up a little short so I added some height to the pattern. With the added height, they control the bottom of my trousers just like the sock-tucking does, but they will look a thousand times better.
In order to keep things within the Bara system, I have translated the original measures as well as my height modifications into Bara proportions. It is pretty remarkable, just how easily the measurements fell into the system.
If you want to make a pair for yourself, you need to line them with something stiff, like drill or canvas. It is wise to make them washable. Whether for period or modern wear, they will get dirty and you should plan ahead for laundering
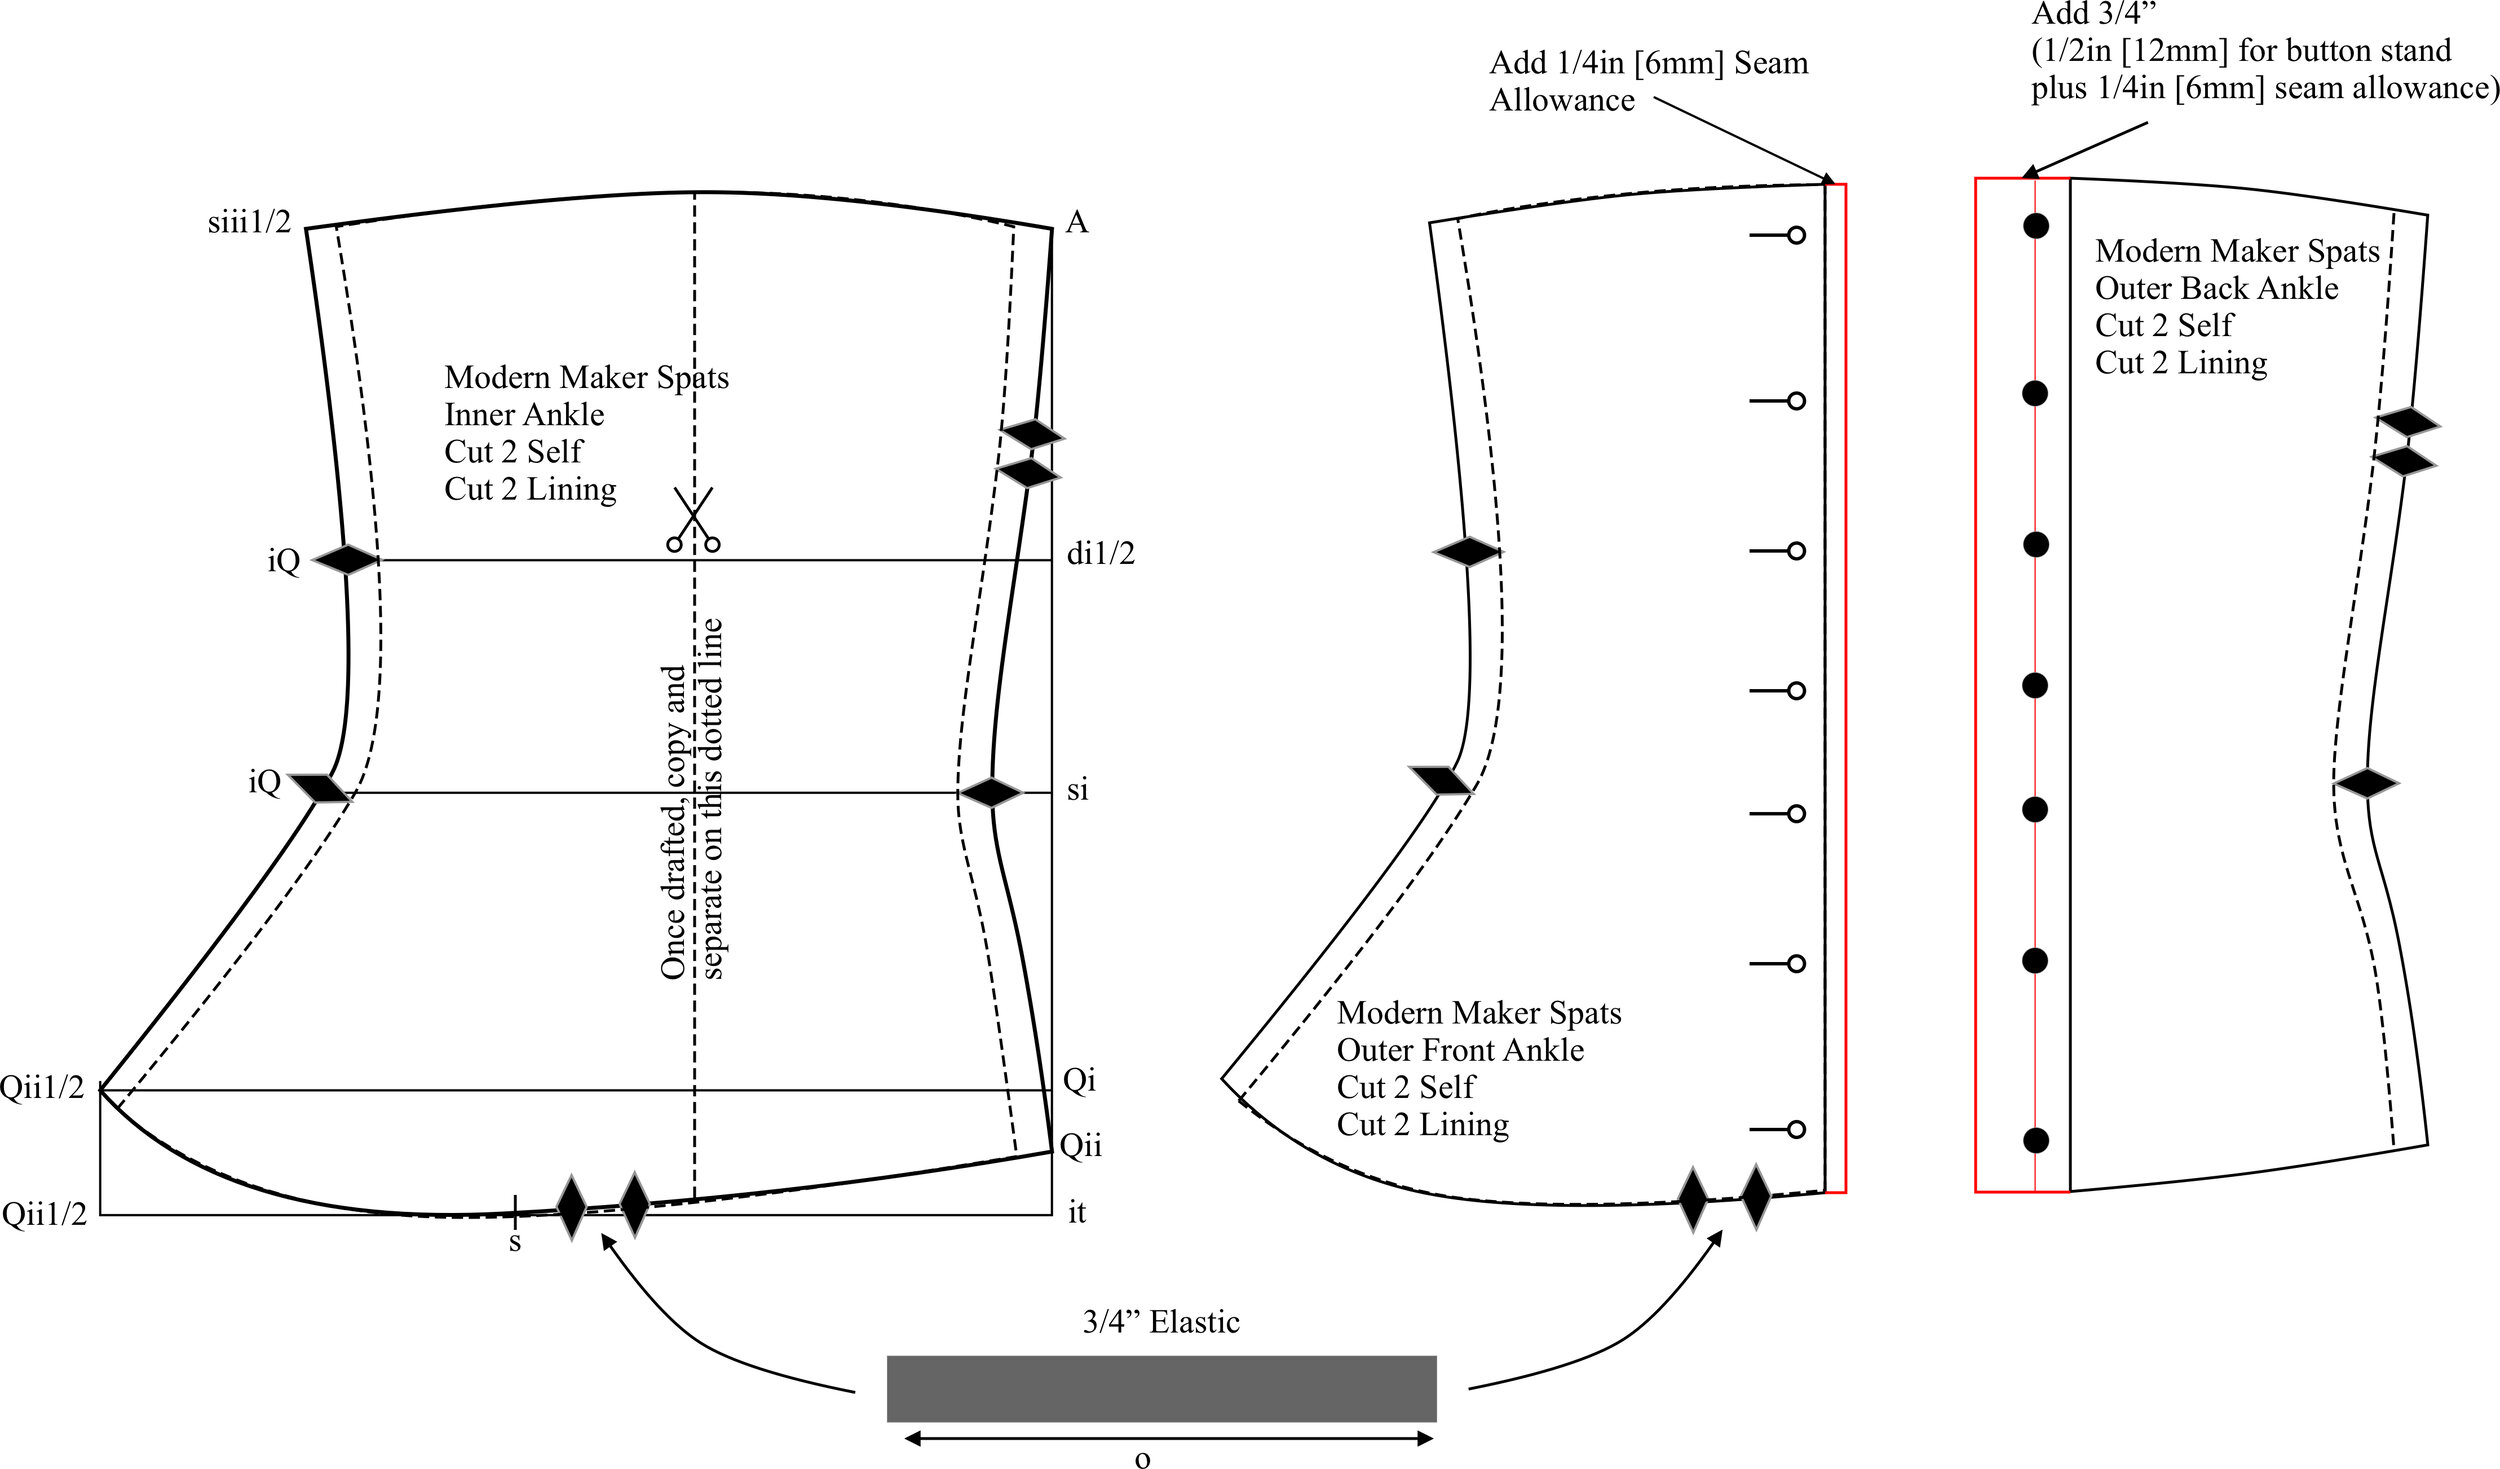
To make them, draft the inner ankle first. It is one solid piece. Once you've drafted the shape, trace off a copy and cut it out, slicing up the dotted line in the middle, as indicated.
Trace off each half of the outer ankle and on the front, add 1/4" [6mm] seam allowance. You'll also want to make sure to use some kind of interfacing in the area. Whether it is a strip of linen or a strip of fusible interfacing, the buttonholes will require some kind of support.
Add an extra 3/4" [2cm] to the Outer Back Ankle piece. This will add 1/2" [12mm] for a button stand as well as 1/4" [6mm] seam allowance.
You will need some 1/2"- 3/4" [1.2-2cm] elastic to go under the shoe and hold the spats in place. This should be cut to a length of "o" with your Bara tape and stitched to the spats at the double notches along the bottom.
The top and bottom edges in this draft are meant to be bound with bias tape, but if you want, you can add a 1/4" [6mm] seam allowance at the top and bottom to allow for turned seams. Of course, consult your research if you're planning making them for historical wear. If you're planning on wearing them daily, like I am, then have fun! I love the look of buttons but I'm also making a version of the pattern without the button stand so that I can use a zipper. Particularly if I make them out of leather, It think the zipper would be a nice touch.
For Size Small (for women's and small men's shoes): Draft with a 32in [81.3cm] Bara tape
For Size Medium (which fits most men's shoes): Draft with a 33in [84cm] Bara tape.
For Size Large (for US size 13 & up): Draft with a 34in [86.4cm) Bara tape
I have some new fabric coming soon from Spoonflower with one of my print designs and I can't wait to make a pair with it. It is a tone on tone damask-style design with a charcoal gray pattern on a black background with lighter gray outlines. I hope it looks as good in real life as it does in illustrator.
The spats mockup came out really well, but I ran out of time to finish a final set today. I will finish them tomorrow and post photos!
I hope you all had a great weekend and are looking forward to a good week!


