Punto in Aria
A Punto in Aria Demonstration
Of course, I work to show you the steps in the lesson videos, but sometimes it can be really beneficial to see the work in action at normal speed without pauses for explanation. In this short video, I demonstrate my preferred method of working
Starting your Journey with Needle Lace
Starting a new craft while missing the most basic supplies is just asking for trouble and frustration. Start your journey the right way by taking the time to gather the proper materials.
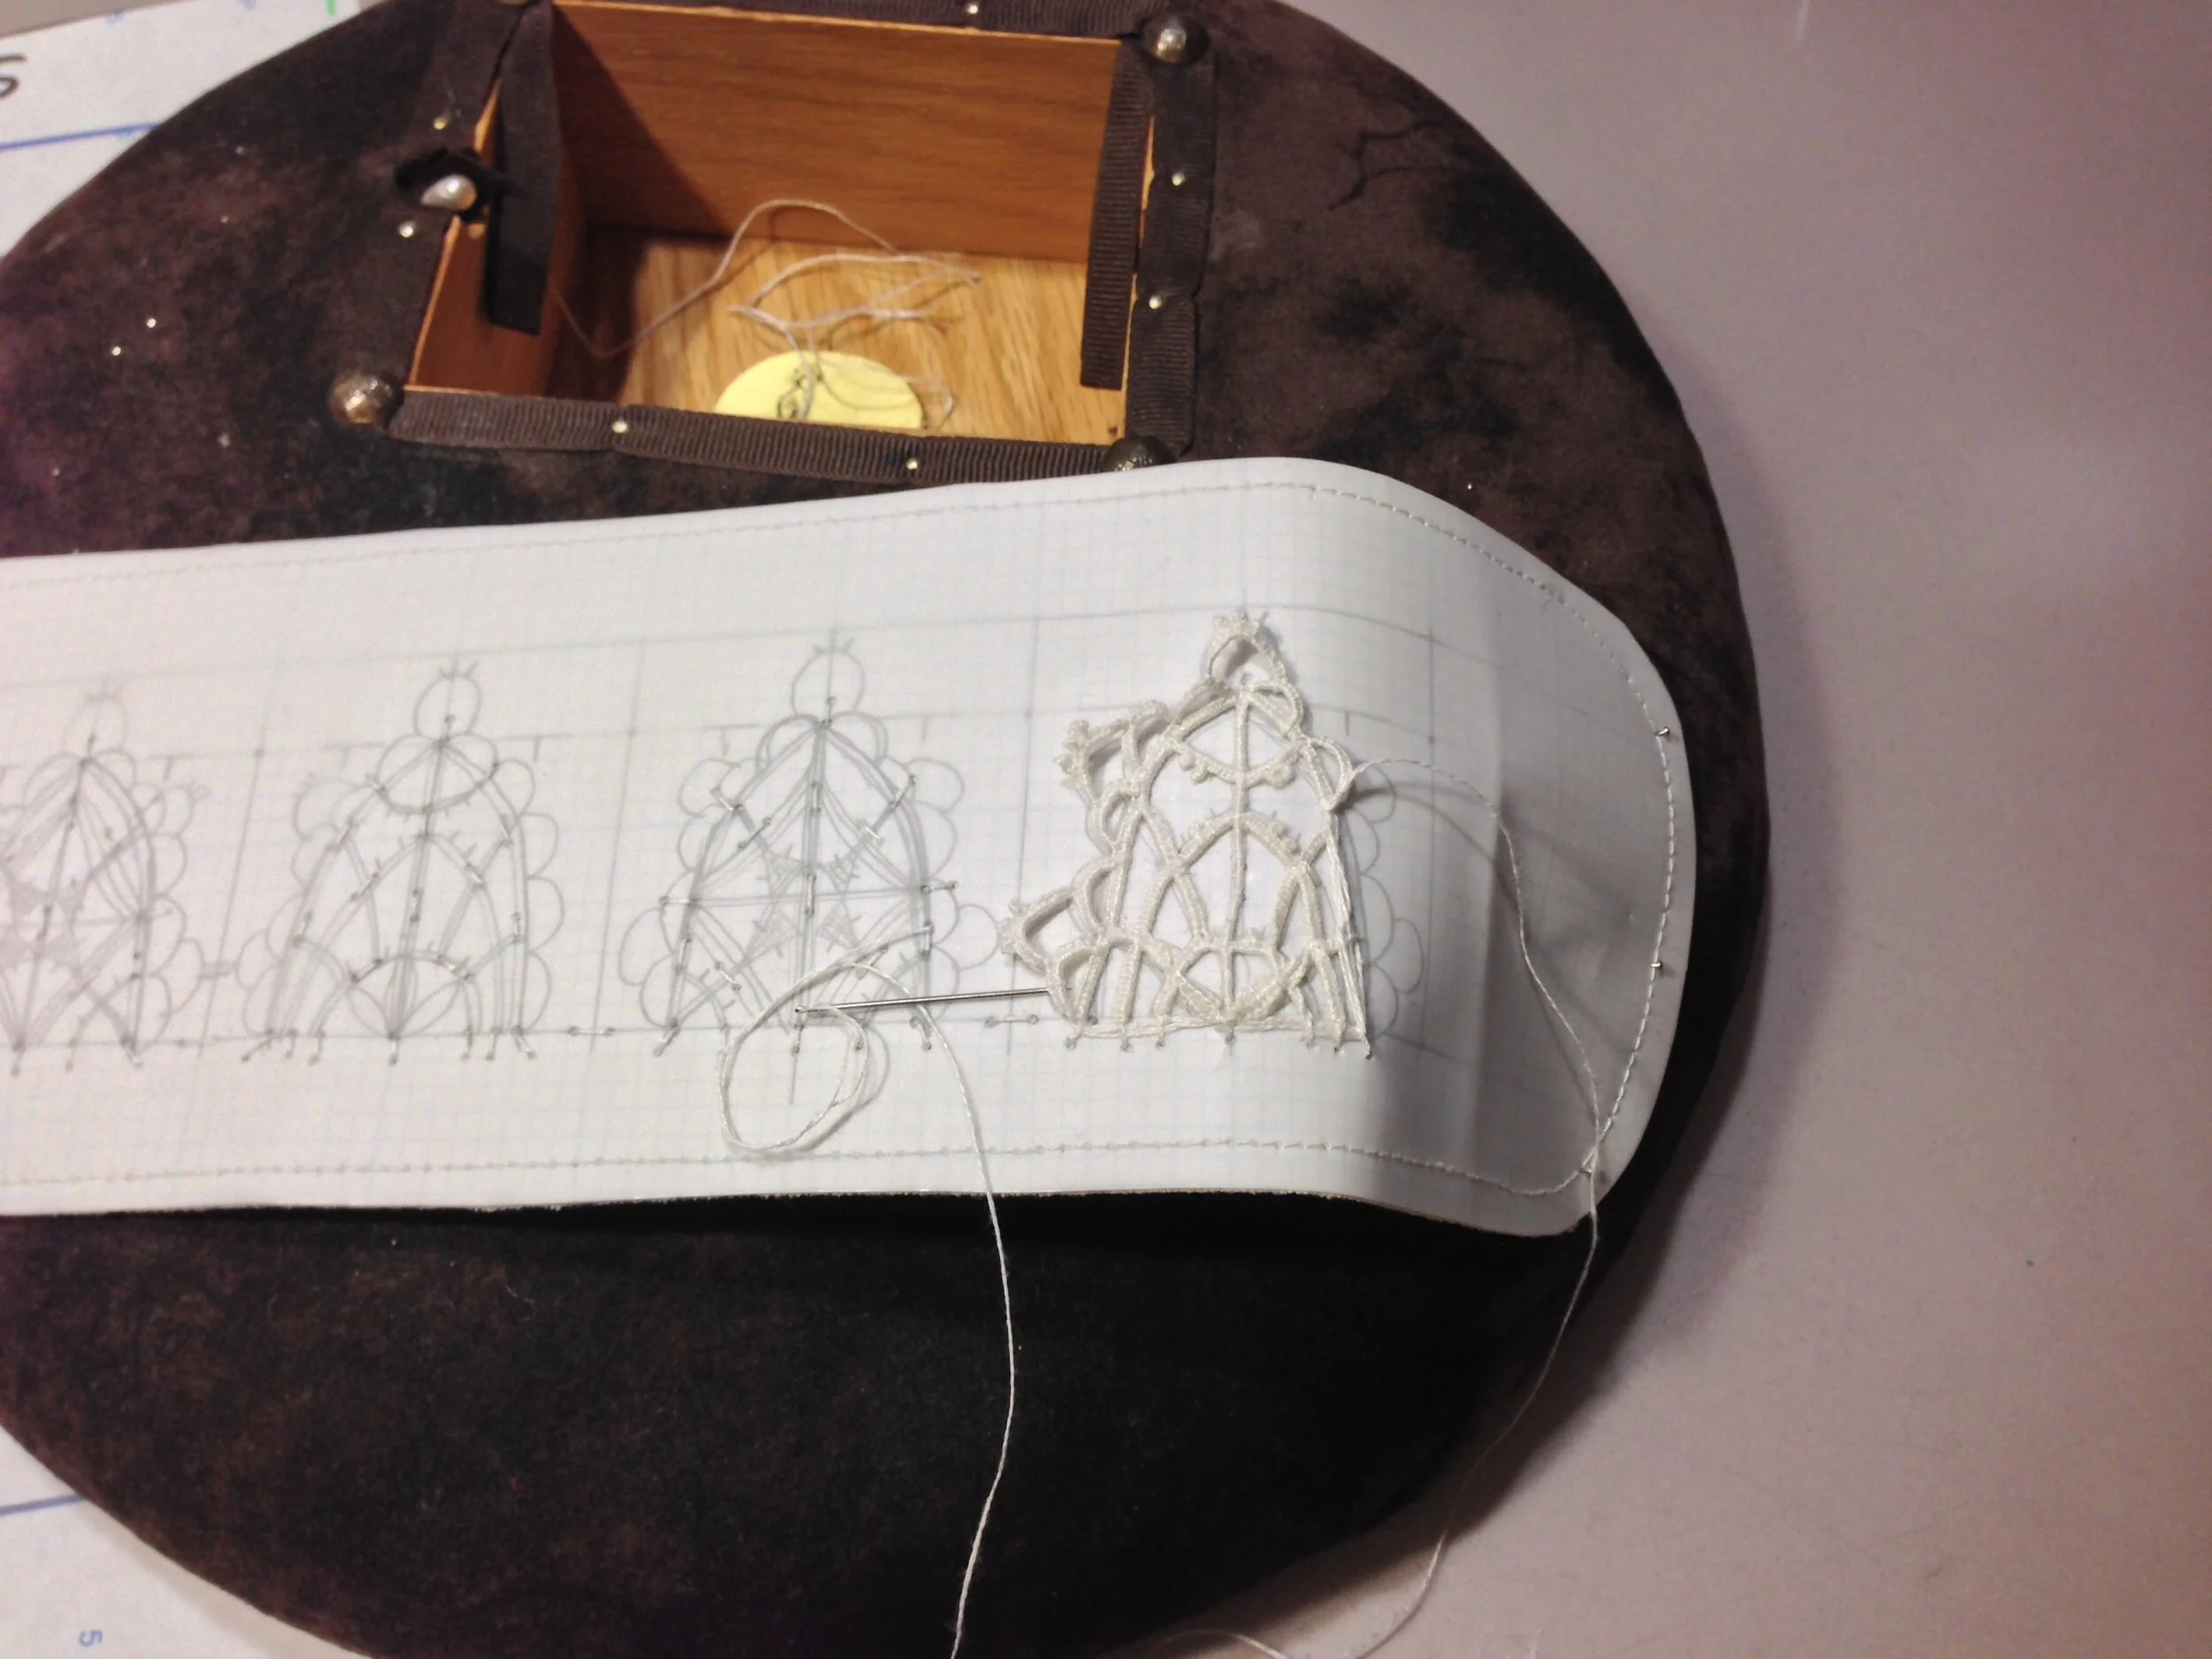
Make your Pattern Template
In this lesson we will make a simple pattern template for developing our needle lace design. While there are a variety of choices you can make, this lesson represents the simplest and most basic preparation. Ease your way into the world of punto in aria with this simple lace.
Prepare the Foundation Threads
In this lesson you will run all of your foundation threads and begin to make the actual structure of the lace.
Work the Corners
Orders of operations are of utmost importance when making needle lace of this kind. Working your corner-fill first leads you into the center and allows you to build a stronger network of lines into which you can work the remainder of the design.
Work the Cross
Now that your corners are complete, you need to work the cross in the center. Three of the four spokes are worked first from outside to center. The final spoke is worked center to perimeter and all remaining fillings are worked as you go.
Work the Central Star
In this video, we will work the tiny ring of arcs in the center of the design followed by the star motif. The points of the center work differently from those in the corners, a slight change in the order of operations enables us to work in a circular way across the spokes of the design.
Work the Outer Arcs
Once the star motif is complete, we will work the outer arcs of the star.
Work the Perimeter
With all of our internal details complete, our next step is to finish off the square by working the perimeter. It is during this step, you will also see how to join a completed motif to the one you’re currently making.
Work the Point:
Part 1
Once the square and the join are complete, it is time to turn our attention to the point. We begin just as we did for the square — by working the perimeter lines and the interior spokes/spines. The process of working is quite similar to working the square.
Work the Point:
Part 2
With the spokes and the corners complete, we will work the central star of the point and then work our way out the top.
Work the Point:
Part 3
It all begins with an idea. Maybe you want to launch a business. Maybe you want to turn a hobby into something more. Or maybe you have a creative project to share with the world. Whatever it is, the way you tell your story online can make all the difference.
Work the Point:
Part 4
The first half of the edging on the point is complete and now we will make the decorative picot loop on the tip of the point and then work our way down the other side to finish the lace.
Finishing the Lace
Now that every stitch has been made and all the details are complete, we will have that magic moment when the lace comes free from the template. We will truly have “Stitches in the Air!”