A Felt Cloak


One of the least represented garments in the realm of historic dress is the Fieltro de Camino. It is a full circle cloak made of heavy felted wool. I have not seen a single image, surviving garment (there is only one) or painting that did not include an embroidered design of radiating lines on both the body of the cloak and on the hood.
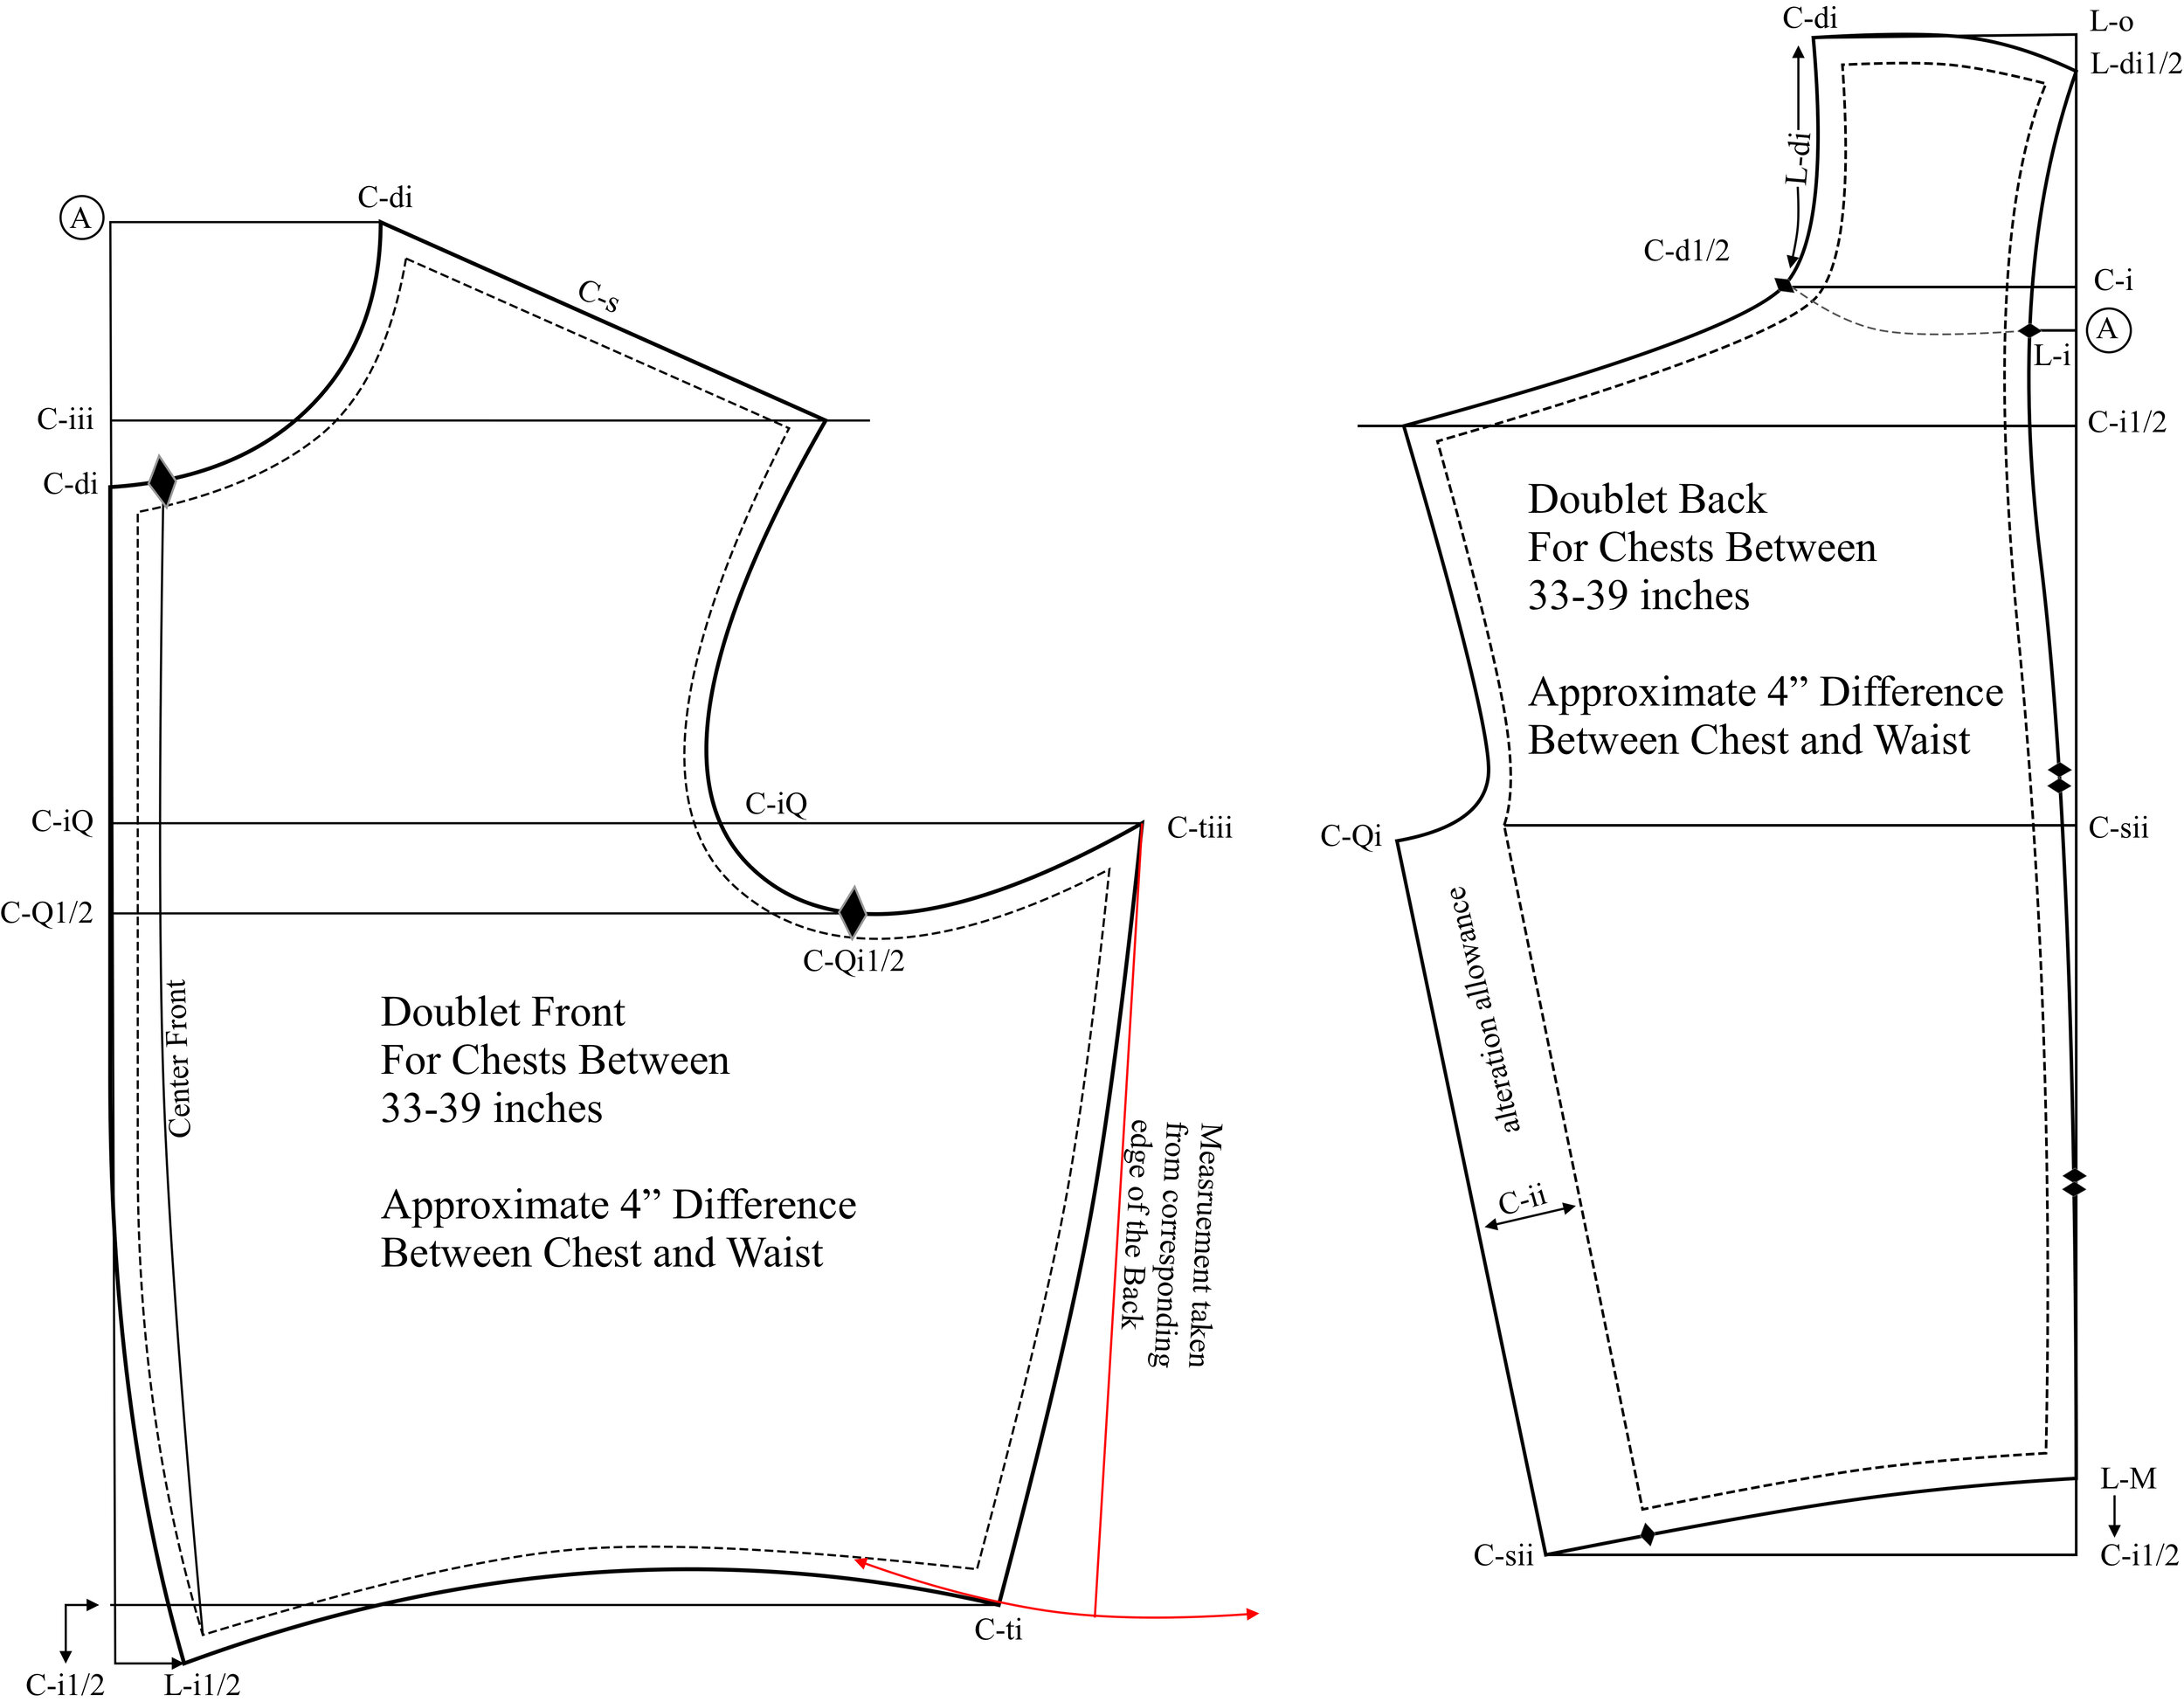
I developed my pattern from the layout given in Alcega's manual of 1580. It is quite basic in its cut and easy to interpret. In the 16th and 17th centuries, felt was made and sold in pre-cut sheets so one was constrained to cut the garment with as few piecings at possible. The felt that I purchased was of a similar width (though ours is made by the yard now, not by the sheet). I was able to cut all of my pieces without need to join on extra fabric to complete any shapes.
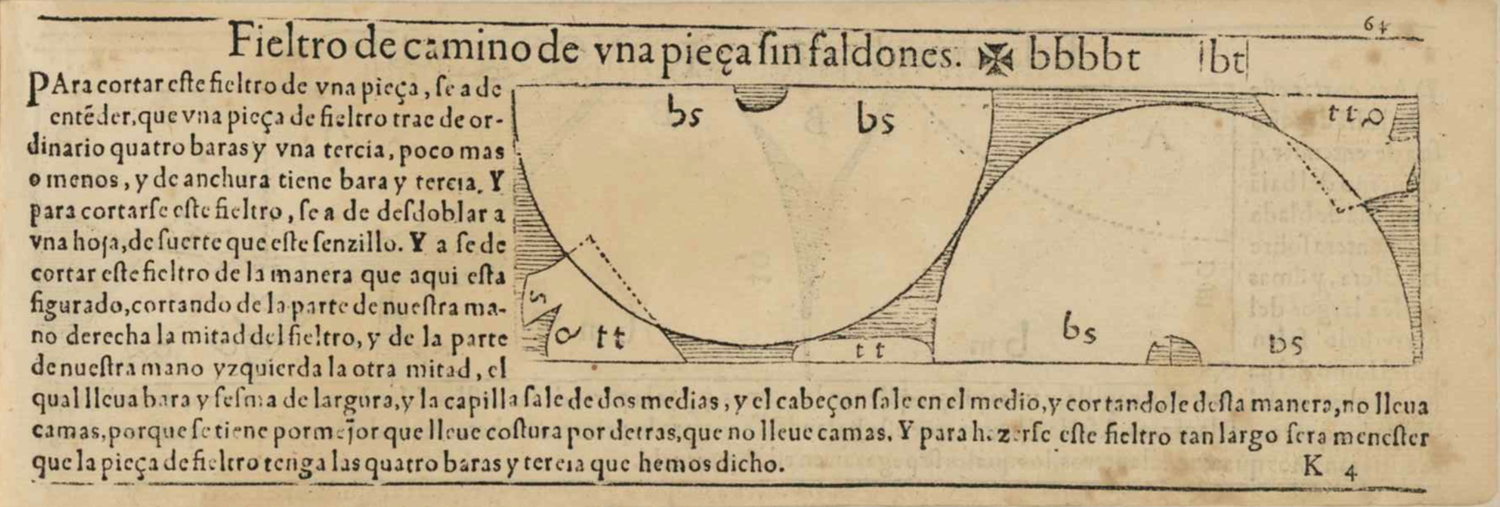
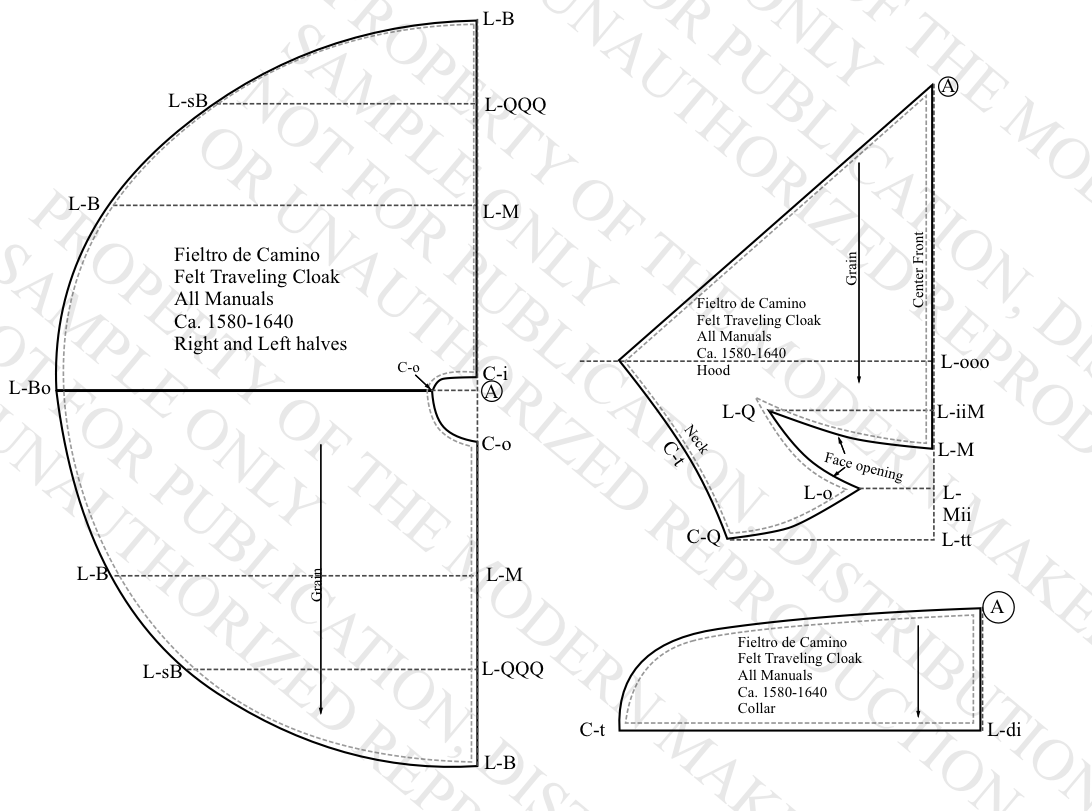
Here is the draft I used to make my cloak. There are some slight variations for example the version in my construction photos is Bs in length rather than B though this shorter length really does appear in the manual. I just made mine longer to fit with Alcega's draft.
There is one surviving example from the 1570's belonging to Stephan Praun III. It is housed at the Germanisches Nationalmusem in Nuremberg, Germany. It is actually a 3/4 circle garment. Its hood is made up separate from the cloak body. In the one painting that exists of Mr. Praun in his pilgrimage clothing with which this cloak was worn, the hood is nowhere to be seen. The second layer is made of leather and is also made separately. From the look of it, though I have no definitive proof, the second layer appears to be heavily oiled for waterproofing. In Alcega's manual, as well as Burguen, and Freyle, the Fieltro is shown in two different layouts, one that is cut with skirting/second layer, and one without. Due to weight, cost and wearabiity, I have chosen not to use a second layer of felt. I may make the second layer with leather, but for now, I just need to finish embroidering this garment and move on to the next piece to make for the book. I'm running out of time as the final photo shoot is at the end of September...right before the book is meant to be finalized and sent to the printer.

Pilgrimage cloak of Stephan Praun III, Germanisches Nationalmuseum--Nuremberg

Closeup detail of the front of the hood
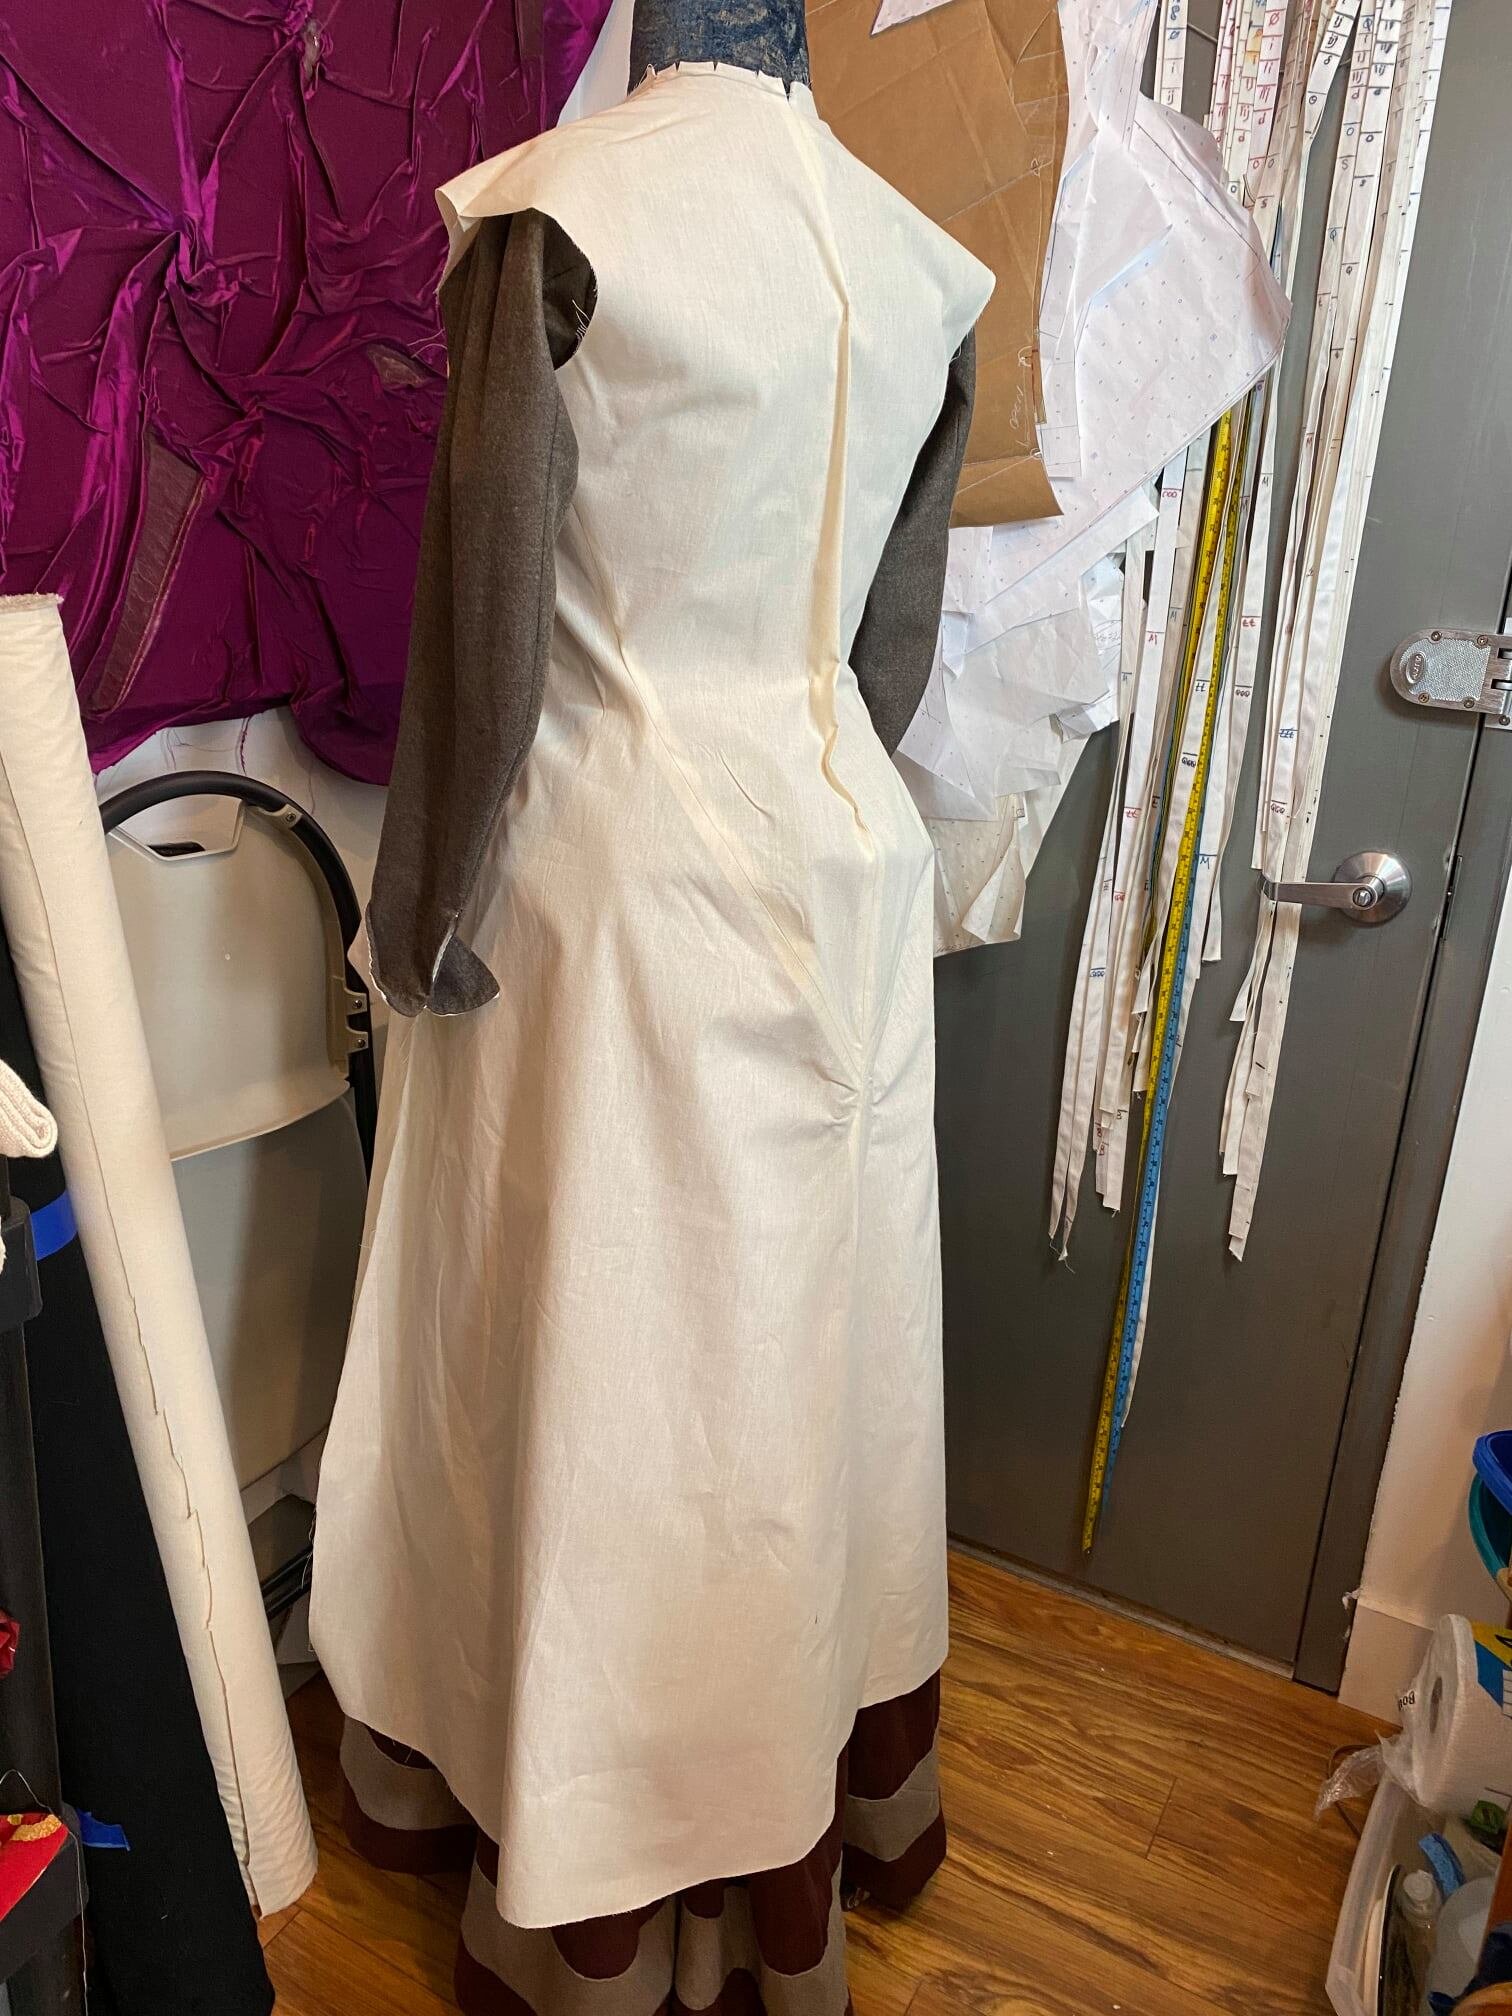
Here is my progress on my copy of this garment so far.
The 100% wool felt is 1/8" (3.2mm) thick. I originally purchased some 1/4" (6mm) and found that it was much too heavy and cumbersome. A friend who actually viewed the original told me that it was approximately 1/8" - 3/16" thick. So, I reordered and got the 1/8" thickness. It was purchased from thefeltcompany.com they have many different kinds of wool felt and it is a really nice product to work with. This is the page with the product that is shown in my photos, Specifically the f3 quality material. When its pressed, you can smell that it still has quite a bit of the natural oils still in it. It is absolutely not suitable for people with Lanolin allergies.
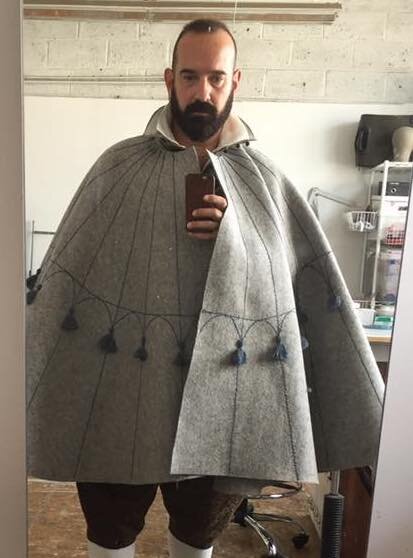
Front
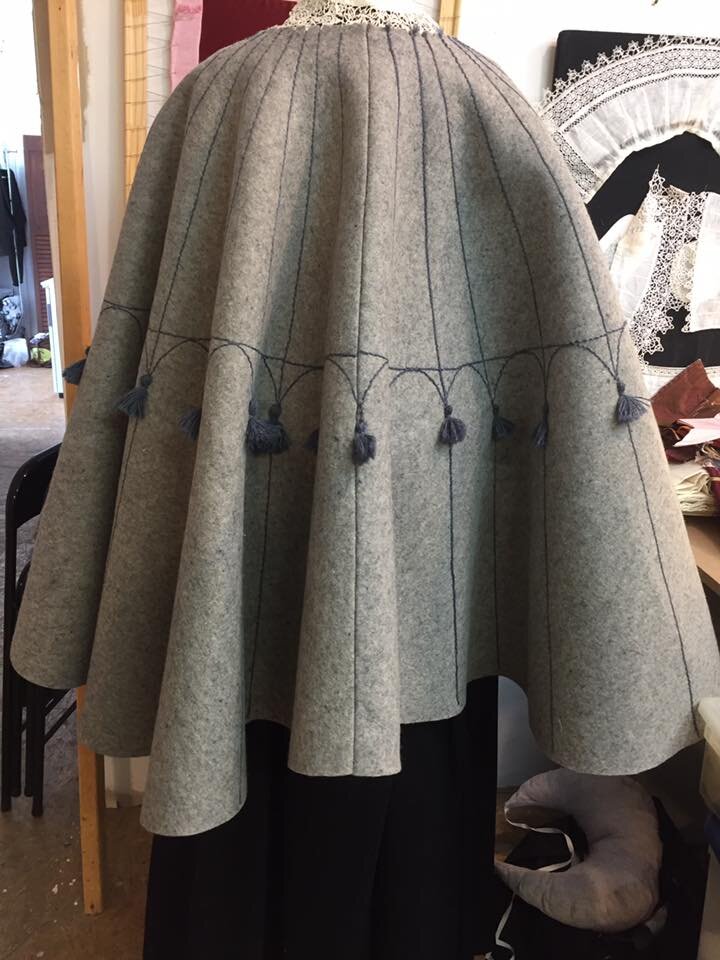
Back

Detail of the Collar

Back of the collar
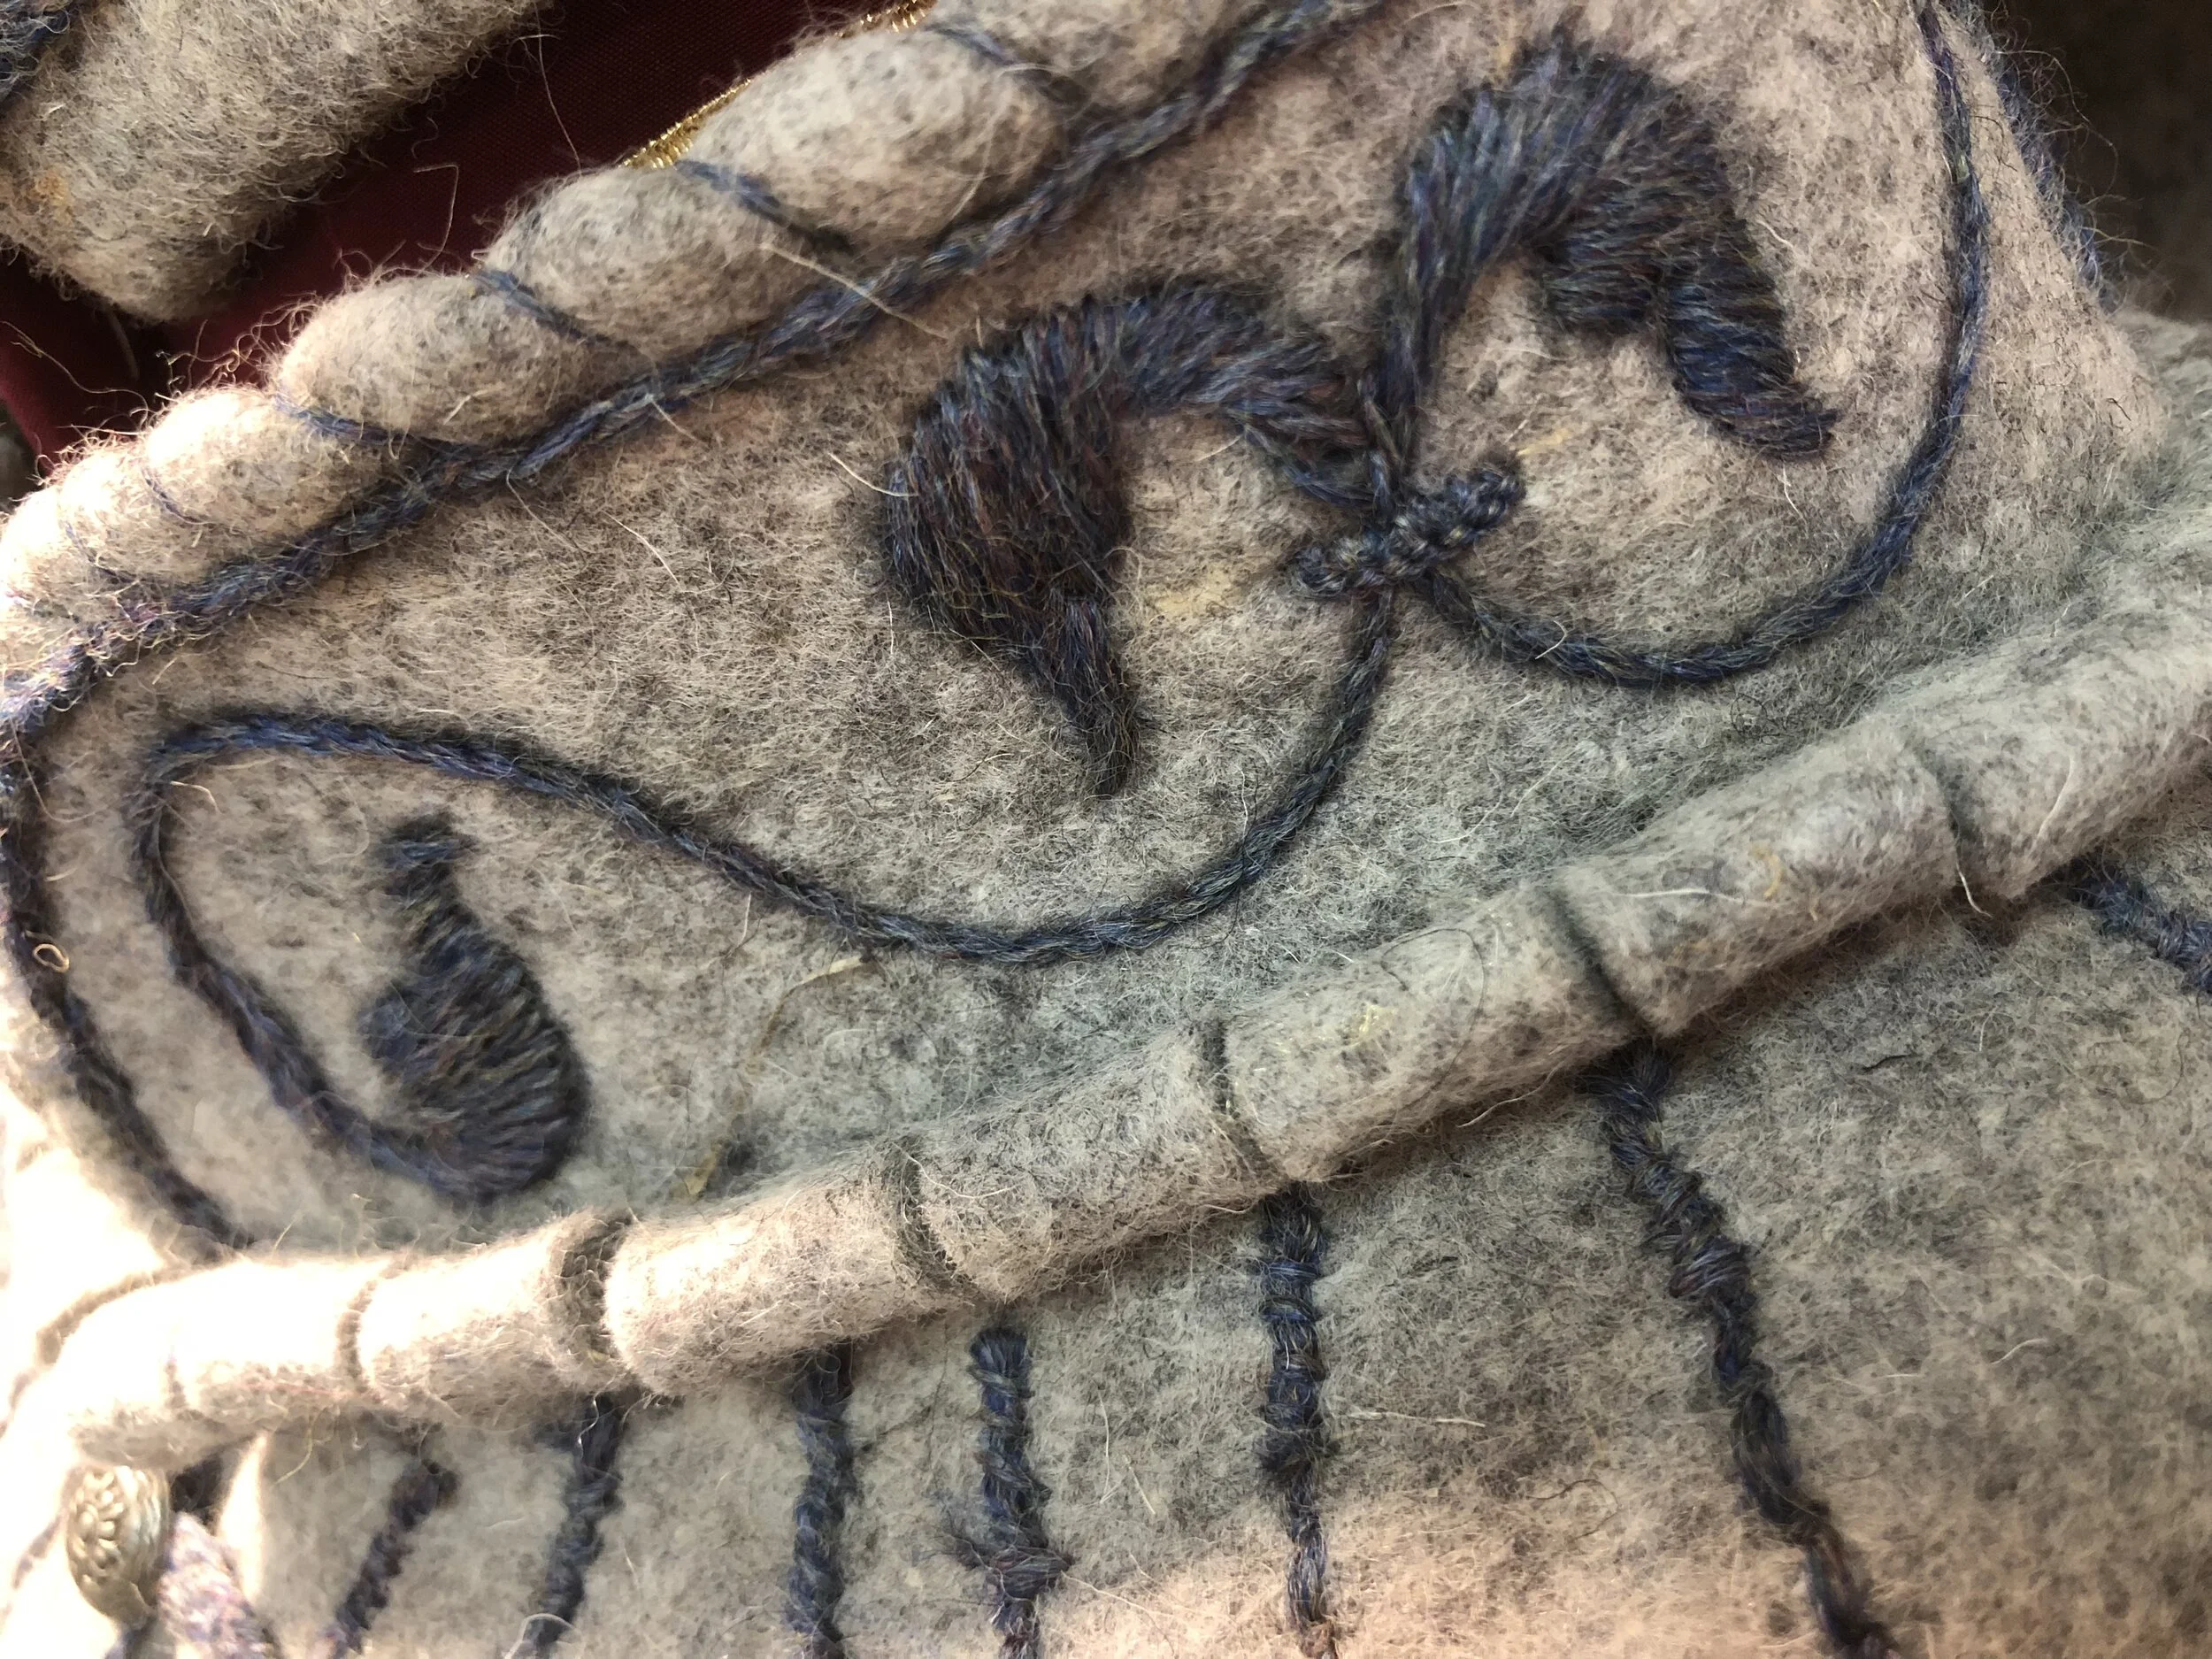
The couching and embroidery is all being done in wool. It was a good color and somehow felt correct for this piece. I suspect for wealthier folks, the embroidery would have been made up in silk.
On the main body, I have used a couching technique with two strands of the wool and the couching stitches themselves in the same wool.
On the collar, the satin stitch for the leaves is worked in a single strand of the wool while the heavy line of the border is four strands of the wool that have been re-spun and plied to create a heavier cord. In retrospect, I absolutely should have used this re-spinning technique for the main body. It looks beautiful. But alas, I didn't think of it until after the body was done and there isn't time to go back and re-work it.
I am saving the embroidery of the hood for last since I really want to have all my design choices made and wanted to have my hands "tuned" to the proper stitching. The embroidery on the hood is quite elaborate in the surviving piece.
I'm pushing myself to complete this project because its standing in the way of so many others. I'm glad its almost done though.
Just so everyone knows what's going on with this book, the projected release date is October 31st 2017. I'm working VERY hard to make sure that date is maintained.
Be well, thank you for reading and as always, HAPPY STITCHING!!


This is a collection of breeches patterns taken from my personal archive.
1560 - based on research on a surviving pair found in Peru
1588 - Freyle's breeches pattern - my favorite. Comfy every-day breeches
1590-1600 - Trunkhose with Canion
1618 - “Venetians” from the 1618 tailor’s manual of Francisco de La Rocha de Burguen
These patterns are graded into multiple sizes and Instructions are included for two of the four styles. They are provided as-is for study, experimentation, and adaptation. Ideal for pattern makers, designers, and historical clothing/costume enthusiasts looking to explore without starting from zero.
Creative Commons Licensing is implied.